![]()
WELCOME to a page created for individuals who wish to learn beginning Hyper Text Markup Language (HTML) skills and web page construction. Primarily constructed to assist my HTML students (Jr. Hi., H.S. and Adult Ed.), it is available for use by anyone who happens to run across this little corner of cyberspace. I have tried to include worthwhile info for all levels of website builders from the novice (my main focus here) to the skilled webmaster. Just take one step at a time!
It may be helpful to print this page so that
instructions may be referenced more easily.
FIRST...get some server space. No one will be able to access your website if your files are not on a server that is connected to the world wide web. There are free servers and paid servers. My recommendation is to use a free server initially. Eventually, if your site grows and becomes interesting or profitable, move your files to a paid server. In my opinion, your best bet for a free server is http://000space.com/ . This is where I put have started putting all of my students' files now that Geocities has announced that they are going out of business. There are many others, and you can find some of them at http://www.thefreesite.com/Free_Web_Space/ .
Should you decide to get your own domain name and put your website up on a paid server you will enjoy many benefits. Most importantly your website will now be at an address easier for the web surfer to find. Our website, for example is: morpheweb-server2.com. morpheweb-server2.com is called our domain name and it can be found by any computer, anywhere in the world, if that computer is connected to the world wide web. I have the domain name and website files uploaded to a server by the name of Dot Easy. It is a relatively inexpensive server which I have found to be fast, reliable and fairly inexpensive. I park some of my customers' websites at Dot Easy. You can go to the Google search engine and type in [ web server ] and you'll come up with a long list of companies that are there to serve your needs. Some are better than others so shop around.
HTML relies on "tags" to tell the internet and your web browser what they are supposed to do. This is called programming, and "tags" are just another word for commands. You are commanding the internet and your web browser to behave in a certain way. There are more of these tags than I can count so we will use only a few of the basic ones in this tutorial. When using basic HTML, if you fail to begin a tag by typing < > and terminate a tag by typing </> it will not work, period.
With few exceptions, HTML is not case sensitive. You may
type tags using upper case letters, lower case letters,
or a combination of the two. For clarity on your screen, I
will mostly use upper case letters here except where lower case is
required or seems more easily understood.
HTML does not recognize your use of the return key to end a
line, tab key to indent, or space bar to generate extra
spaces. A couple of work-arounds may help you here: The letters/characters allow you to add a space (very similar to using the space bar on your keyboard) wherever you want one. Put 5 or six of them together as in: and you will end up with a 5- or 6-space indentation. The back door for the return key is <BR> which is a line break with no space between lines (discussed below). Those should be of help to persons who are particular with their layouts.
You cannot compose HTML using Microsoft Word or Appleworks. You need to use a simple text editor for composing HTML. On a Mac use Simple Text in OS-9, Really Simple Text (download here) in OS-X and use Notepad on a P.C. The internet will not recognize several characters commonly produced in Microsoft Word and Appleworks (including quotation marks, which are fundamental when composing HTML). Also, as your skills improve, you may want to download a program which will help you compose HTML. For the Mac, go to: Pure Mac to download the program of your choice. For the P.C., I recommend that you use Arachnophilia, an easy-to-use and popular freeware program available at: http://www.arachnoid.com/arachnophilia/.
For you who just want to see if this even works, I've prepared a small web page for you to upload immediately. Click HERE if you'd like to build a sample page right now. If you don't wish to do this, just proceed on down this page.
Begin your web page with the following:
<HTML>
Your text, graphics, links, etc., must go between the <BODY> tag
and the </BODY> tag.
End your web page with the following:
</BODY>
BACKGROUND COLOR: Play around with the body bgcolor tag outlined above. By changing the FFFFFF to 000000, for example, you would be changing your page's background from white to black. Some other colors are noted below, and clicking HERE should take you to a good color chart with many other colors listed. BACKGROUND IMAGES: Additionally, many web designers (both novice and pro) prefer to use an image for their page background instead of solid colors. Here's a family genealogy page that I master that uses an image for the background (actually the background is in three parts so I use three different images on this particular page.) There are lots of interesting images available on the internet (just Google background images free) but this link takes you to backgroundcity.com which I like because it allows you to see what the image will actually look like once you get it installed. Internet browsers will take the image you want to use and tile it to cover the entire page giving you a flawless background. This tiling occurs in all browsers commonly used on a Mac or on a P.C. Be careful here though as really wild patterns can make your webpage difficult/annoying to read. To get a browser to recognize the background image that you want to use you will have to change one line of code in the "Program Elements / Install These First" discussion above. For solid colors use the code that I have provided above <BODY BGColor="#FFFFFF" Text="#000000" Link="#FF0000"
VLink="#0000FF"> - however if you wish to use a tiled background image change that one line of code to: <body background="name_of_gif_or_jpg_image_file_goes_here" Text="#000000" Link="#FF0000"
VLink="#0000FF">
Have some fun with this and try making your background image yourself by using, for example, your children/grandchildren as the basis of your background image. Here's a little sample of what you could do but notice that I greatly reduced the contrast of this photo to make the text readable.
If you would like to check out the triple backgrounds that I used in the example above go to http://www.artistic-designers.com/bkgds/mixnmatch.html for a very nice collection of backgrounds and full instructions on how to incorporate these into your webpage background or Google triple backgrounds free for additional choices.
Adding a paragraph or a horizontal ruled line are two
tags which do not need the termination tag. To add a
paragraph break (blank line space - such as is used on this page),
type the following into your text: <P>.
Remember, no termination tag is required for paragraphs.
If you want to end a line of text and begin a new line with
no blank line between the two, simply type this tag:
<BR>. No termination tag is required for this.
To add a horizontal ruled line separator (gray line),
type the following into your text: <HR>. Again, no
termination tag is required. To create a horizontal
ruled line separator between lines try this:
Rocky loves to play the flute.<P><HR><P>He
and his family love to travel.
The result would look like this:
Rocky loves to play the flute.
He and his family love to travel.
Horizontal ruled lines can be placed anywhere in your text
and as often as you choose. They may be changed by adding
information to your input data. You can adjust
alignment on the page by using CENTER, LEFT, and RIGHT.
Change the width of the line by adding WIDTH=40%. You may
choose any other per cent. The thickness of the line can be
modified by using SIZE=10. Try other numbers until you are
satisfied with the result. Finally try NOSHADE to produce a
thick black line. Putting all of this together as follows:
<HR ALIGN=CENTER WIDTH=40% SIZE=10 NOSHADE> and we
will get:
You may wish to use bold letters to add emphasis, clarity or
interest to your text. You will notice that most of this
page is done in bold text to improve readability. This is
very simply done by using the HTML tags <B> for
bold letters and </B>to terminate bold letters. Another tag that works in nearly the same way is <strong> and </strong> .
Italics are accomplished in exactly the same manner as bold
lettering, except you substitute the letter "i" in your
tags. The begin italics tag is <i> and the
terminate italic lettering tag is </i>.
To center text on the page use the following tag:
<CENTER>. At the end of the words you want centered,
enter the terminate centering tag: </CENTER>. An
example of the use of centering would be as follows:
![]()
![]()
![]()
<HEAD>
<TITLE>
"title of page here"
</TITLE>
</HEAD>
<BODY BGColor="#FFFFFF" Text="#000000" Link="#FF0000"
VLink="#0000FF">
</HTML>
![]()
![]()
![]()
Input for the foregoing was <CENTER>An Example Of
Centering</CENTER>.
To change font size, use one tag to change the font and a
second tag to change it to a particular size. Experiment
with the numbers plus (+)1-6 and minus (-) 1-6. Your
tags are <FONT SIZE=+2> and </FONT> Place
the words you want larger or smaller between the tags.
So, if you wanted the following words to appear on your page
in, say, a number 2 font, you would input as follows:
<FONT SIZE=+2>LARGE FONTS STAND OUT!</FONT>.
This would yield: LARGE FONTS STAND
OUT!
Current browsers support many hundreds of different colors. Try some of these
to add style to your page.
It is recommended to enter a color using its hexidecimal code, although newer browsers don't have a problem with the names of colors being spelled out. Some of
the hex-code for standard colors follows.
Color is added to fonts by using tags. <FONT
COLOR="#FF0000"> is one example. When you add a color,
everything that follows will appear in that color unless you
program a return to the original color or the new color you desire. To change only one
word in a sentence from black to another color, enter the
following: I really do <FONT COLOR="#FF0000">love<FONT
COLOR="#000000"> to change font color! It would look like
this: I really do love to change font color!
If you want to add a colorful or otherwise special
background to your page, first upload the background to your
server. Once the file is uploaded to your server use the following
HTML to retrieve the background on your page each time the
page is opened: <Body Background="put URL for your background here"
"Text="#put color code for text here" Link="#put color code for Links here"
VLink="put color code for followed links here"> This should be at the
very top of your
page - right after </Head> .
At this point you are ready to experiment. You have studied
several tags. To add a pleasing/interesting look to your
web page, put together any of the several tags you have
learned.
A list of commonly used HTML tags is located at: http://morpheweb-server2.com/commontags.html. Try some of these to have some HTML fun and to learn a lot!
Bulleted lists are handy for organizing material within your
text. This procedure uses the <UL> unordered list
tag, which requires a termination tag of
</UL>. Try this input: <UL><LI>Item
One<LI>Item Two<LI>Item Three<LI>Item
Four</UL>. The result will be as follows:
You can play around with this a little and try additional indentations. The bullets do change in appearance as you make more indentations, however. Try entering this:
<UL><LI>Item
One<LI>Item Two<LI>Item Three<LI>Item
Four<UL><LI>Item
Five<LI>Item Six<LI>Item Seven<LI>Item
Eight</UL></UL>
The result will be as follows:
A numbered list, called an ordered list, is useful when you
wish to place numbers before the items in a list. Entering
these values: <OL><LI>Item One<LI>Item
Two<LI>Item Three<LI>Item Four</OL> will
result in this outcome:
To link another location on the internet, create a hyperlink
with that remote location. If you wish to link your page to
the home page of one of your friends, create a link similar
to this:
CLICK HERE TO GO TO SUE AND LARRY'S HOME PAGE!
Go Ahead! Click there and you'll go directly to our home
page.
To create the foregoing hyperlink, I typed in the following:
<A HREF="http://morpheweb-server2.com/homepage/">CLICK
HERE TO GO TO SUE AND LARRY'S HOME PAGE!</A>. The A
HREF tag must be followed by </A> (terminate)
tag, or all of the text that follows will be underlined
and will link to the address in your hyperlink.
To add links to favorite pages, go again to the Google search engine
and find U.R.L.'s (Uniform Resource Locators) for the pages
you wish to link. Type them in as I typed in SUE AND LARRY'S
HOME PAGE. Your page will be connected to those favorite
pages! This is one of the beautiful things about the World Wide Web! Remember: <A HREF="URL
of page you want to link"> INFO ABOUT PAGE </A> and if you would like the link to open in a new window modify the code as follows: <A HREF="URL
of page you want to link" target="_blank"> INFO ABOUT PAGE </A>
Animations, referred to as animated gifs, add color and
movement to your home page. Adding them to your webpage can be easy and
fun. Go again into the Google search engine and look for "free animated gifs". Once you have selected an appropriate animation, upload it to your server.
For my animated photographer, this is the code that I entered into my
HTML document: <IMG
SRC="Photographer.gif">. You could, of course, precede and conclude all of
this with paragraph and centering tags in the following
manner: <P><CENTER><IMG
SRC="Photographer.gif"></CENTER><P>. If you enter your tags
in this fashion your animation will appear as:
![]()
![]()
![]()
![]()
![]()
![]()

I need to
point out however that I do not give permission to link to any of my
graphics. Remember, it is necessary that you upload
graphics to your own server.
Once the file is uploaded to your server use the following
HTML to retreive the picture on your page each time the page
is opened: <IMG SRC="put the address of your art
here">
The full and complete code for adding this animated gif to your website is: <IMG SRC="Photographer.gif" WIDTH="131" HEIGHT="128" BORDER="0">. Adding the size of the gif to the tag will help the browser place the gif quickly and accurately and adding the border information will tell the browser whether or not you want the browser to put a solid-line border around the gif. "0" stands for zero pixels in the border and it is what I used here. "1" would yield a one pixel border, "2" a two pixel border and that continues for as wide as you want your border to appear.
You may place photos or other graphics on your webpage in
exactly the same manner as animations. The same "Image
Source" tag is used. You need only to find a graphic you
want to include. Click on that graphic to save the graphic to your hard drive
and proceed as outlined above. A word of COPYRIGHT CAUTION is in order here. Be
careful to check the location where you found a graphic to
see that no copyright is claimed on that item. Actually a
copyright does exist as soon as someone creates art. Usually,
though, website owners will allow you to copy their photos,
etc. If they do not want you to copy their art they will
usually put a copyright notice somewhere on their page (as I
have done here). [Copyright 1996-2007 by Morphew Web Design]
Do not knowingly use any animation or other graphic which
you know is copyrighted!
To use your own photographs on your home page, use either digital images from a digital camera or photographs that have been digitized by a scanner, and upload them (as jpg's)
to a place on the net/web where your computer can retrieve
them on demand (i.e.: your server). While photos can be linked at remote locations other than
your own server, it is always preferable to upload art to your own server. The alternative is theft of bandwidth from the other website. When uploading photos be sure you optimize them for the web before you upload. This will greatly reduce the file size of the pics and make them load much faster. In later versions of Photoshop, photos are easily optimized by going to "File/SaveForWeb and saving them as progressive jpgs at quality 60 or so. If you do not have Photoshop software, Mac users can download Graphic Converter shareware which does a nice job and is available for OS9 and OSX. P.C. users can download JPEG 2000 Compressor which appears to be a good photo optimizer. (I've never personally used this one.)
There is a good online tool for optimizing graphics, that you may wish to check out. Go to http://tools.dynamicdrive.com/imageoptimizer/index.php to access it. Here you will either upload the graphic to their site for optimization or give the generator an address where it can find the graphic on the internet. It will be returned to you on the same page that you used for submission and it will be returned in 8 or 10 levels of optimization. You then pick the optimization level that you like best and save that particular photo from their site for uploading to your server. A word of caution here, though. It is easy to overdo graphics optimization, and you will want to avoid optimizing to the point that your graphic starts to get pixelated or blurry. The samples below came from this online tool. The original is an 88 kb. file. Each optimization level drops that down to a faster loading file size and the final sample (obviously unusable) is only 24.5 kb. Just be careful here and be sure you end up using a file that still looks good. Thousands of people are switching from dial-up to broadband or dsl internet connections daily. Consequently, the file size is much less important. Anyhow, here are the samples.![]()


Once the file is uploaded to your server use the following HTML to retreive the picture on your page each time the page is opened: <IMG SRC="put the address of your art here"> - The full and complete code for adding the following jpg to this website is: <IMG SRC="sue_larry_060204.jpg" WIDTH="125" HEIGHT="157" BORDER="2"> .

A suggestion for using Photoshop: I do not claim to be an expert at using Photoshop. I know people who do make that claim because they've taken a night class and have had some small successes at using this software. But most of them are far from being expert. In all my web design and photography contacts, the only true Photoshop expert I know is my daughter-in-law, Sarah Morphew . That kind of respect from a fellow photographer is hard to come by. How did Sarah get that kind of respect from me? Classes - yes, of course, but she also worked for one of L.A.'s top wedding photographers for 7 years and did all of the Studio's Photoshop work. When you're charging for your work you'd better be absolutely sure that the photograph is perfect. Sarah's work is that good - amazing!
Don't be disillusioned and don't give up. Photoshop is too important in current photography for you to throw in the towel. You have to realize that Photoshop is extremely powerful software. All other graphics programs are simply trying to imitate Photoshop's features, and they fall far short. I have been studying and using this software since the late 1990's, and I continually find new things that Photoshop can do. Part of the problem in Iowa (just using Iowa as an example - this may be true in all states) is that a person goes to a regional community college and takes a class in photography, and when s/he completes the class the instructor says that s/he is a professional photographer. This elicits false expectations for the student. Or, some take Photoshop classes (often from inept instructors,) and when they complete a class the instructor tells them that they are "photographic designers", "graphic artists", or some similar title. More false expectations elicited. In some ways you can't blame the community colleges. They're just trying to stay viable. But they dirty their mission and mislead their students.
One of the downfalls of Photoshop is its cost. Adobe Photoshop CS4 Extended currently (5-09) retails for a thousand dollars. There are some ways of getting it cheaper, though. If you're a teacher or student, there is an education version that is considerably less expensive. Check at the bookstore of a state university to see if you qualify for this discounted version. If you do, you should be able to get their education equivalent for around five hundred dollars. If you're not sure you need to have full-blown Photoshop software, you might want to try Photoshop Elements. This software does not have all the features of its parent, but for most amateur photographers it has more than enough. Elements runs around ninety bucks. If you'd like to use Photoshop for free, there is Photoshop Express. This is a stripped-down version of Photoshop that is available online.
If your interest is in improving your snapshots and you don't claim to be a professional photographer or graphic artist, the following is something that you can do fairly quickly to achieve better-than-average results.
This photograph was sent to me by a website customer. As you can see, it is muddy and lacks contrast. When I first saw this photograph, I thought it was probably not usable.
I opened this photo in Photoshop and performed the following fixes: Image/Adjustments/Auto Contrast. The improved result follows.
This has been added to this CyberClassroom because someone asked me specifically how to salvage an underexposed photograph. As other inquiries warrant, I may add to this Photoshop information.
![]()
There are many easily configured JAVA Scripts available on the internet for your use on your website. Again, a search of the net using the search words [ java script free ] will get you more potential sites than you'd ever need. A couple that I've used in the past are http://www.dynamicdrive.com/and http://javascript.internet.com/. A word of caution here regarding the use of multiple java scripts on a webpage. Java scripts can conflict with each other if they are written in the same language. When I encounter this problem I sometimes copy the code from a different website that will give me the same end result. For example, if you are already using a script from javascript.internet.com and a second script from that same location causes a conflict, go to dynamicdrive.com and search out a script that will accomplish the same thing. They should not conflict as they are written in two different languages.
JAVA PHOTO ALBUMS - One good use of JAVA is in building photo albums. If you use Photoshop for photograph optimization, you could use Photoshop's built-in web gallery feature. It's accessed in later versions of Photoshop by going to: File/Automate/WebPhotoGallery. It's very user-friendly if you're handy with Photoshop. It is fast and does a good job of optimizing the photos for you. HERE'S an example. If you're on a Mac but don't have Photoshop, HERE'S a freeware piece of software that works in a very similar manner to Photoshop's web gallery. Can't beat free!
ANOTHER PHOTO VIEWING OPTION - I use this slide viewer on the opening page of my business website. Go HERE to see it. This viewer is simple to program and reliable to use. It is available in both a manual version and the automatic version (that you see on my opening page.) You will find the code for the manual viewer HERE and the code for the automatic viewer HERE.
YET ANOTHER PHOTO VIEWER - Here's a cute one that is, once again, from [click] Dynamic Drive. Works well and is easy to configure.See it HERE.
A FLASHY LITTLE PHOTO VIEWER - Here's another photo viewer from [click] Dynamic Drive. Run your mouse over the following thumbnail images and over the two text links below the images. I like this one a lot and given the right application I will probably use it.
Interior
FROG PHOTO VIEWER/SLIDESHOW - The author of this free script from Dynamic Drive calls the script "Frog" - so will we. I really like this script and will be watching for a place to use it. It has it all - image preloading, hyperlinked main image, captions, titles and classy image movement. Go HERE to grab the code and all related .js files. Samples of "Frog" are shown HERE and HERE. People viewing "Frog" on a dial-up connection will probably not like it much as there are, depending on what you're showing, a lot of images to load. (my sample pages include several images to illustrate this very point). Hints: Keep your main images at 500 pixel width (or less) to get the best layout. Optimize the thumbnail images and the main images to around quality 40 or so to make them load fast enough to keep up.
PAGE OPENING WITH SPLASH SCREEN EFFECT - Dynamic Drive offers this fun way to open your website, and the script is free. Go HERE to grab the code. A sample of the splash screen is shown HERE.
MOUSEOVER BUTTONS JAVA SCRIPT - If you want to make your link buttons change when you place your mouse over them, you need a mouseover JAVA script. Here's a free one that I have used. It's a good one, easy to install and not complicated at all. This is also from Dynamic Drive and is called an "Image Rollover". You can see the buttons below. They do have a mouseover effect, but they are not linked to any pages for this demonstration...

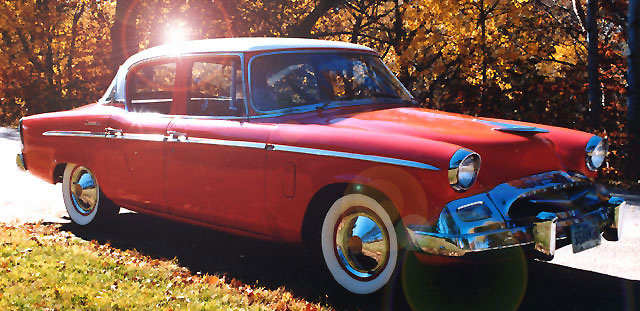
Our 1955 Studebaker Commander (View One).
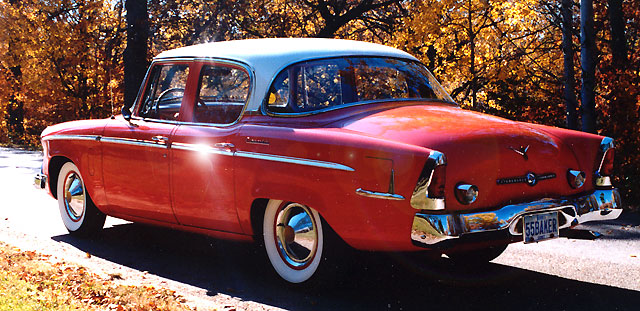
Our 1955 Studebaker Commander (View Two).
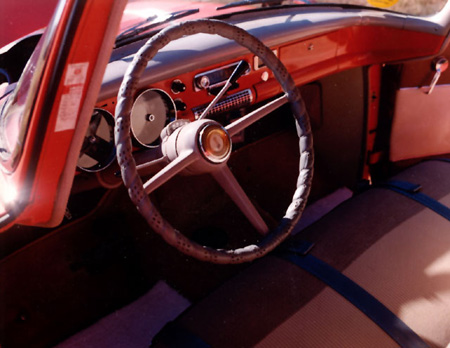
55 Dash and Interior
Engine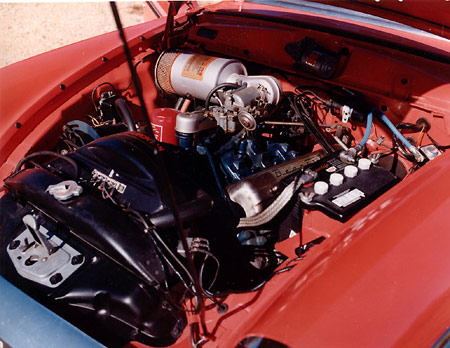
Engine Compartment


POP-UP WINDOW - Again, Dynamic Drive offers a pop-up window generator that works well and the code is free. HERE'S one that works with images (in this case buttons,) and you can see a variation HERE that works from text links. This is a configurable script and is sometimes a nice way to present a photo enlargement from a smaller (thumbnail) picture or to present a new webpage from a hyperlink. HERE'S a working example of utilizing a pop-up window to facilitate the viewing of a photo enlargement.
PLAYING STREAMING MP3's - When it comes to streaming audio, you can just upload an MP3 to your directory and link to that file. Here's a LINK to an MP3 file. Not very attractive when it opens, is it? It gets the job done, but isn't classy at all. There are some free mp3 players on the internet that are classy, but a couple of them don't do what they claim to do and a couple are pretty hard to configure. One that works quite well, though, is the XSPF Web Flash Music Player, and it's free for download. It looks good and works well. I've used it a time or two myself.
PLAYING STREAMING VIDEO - When it comes to video, you can just upload a Window's Media Video (.wmv), a Quicktime Movie (.mov) or an MPEG (.mpeg) and link to that file. The problem with this is that when the video comes up on the surfer's screen it also downloads to their computer. This is not always desirable, and it can take a long time to download a relatively large video or audio file. Additionally, cross-platform issues are paramount. Windows Video files will usually open on a P.C. (IBM compatible computer) whereas they seldom open on a Macintosh (Apple) computer unless the owner of that Mac has downloaded the free Windows Video software. The same can be said for Quicktime Movies, but the other way around. Quicktime files usually open on a Mac but seldom on a P.C. (although Quicktime is installed from the factory on some P.C.'s) unless the owner of the computer has downloaded the free Quicktime available at apple.com . If I were choosing from the foregoing, I'd probably choose to have the MPEG file available for download. It is pretty universal and most browsers will open it with no problem.
PLAYING STREAMING AUDIO AND VIDEO (BEST METHOD I'VE FOUND) On my customers' websites I usually use the Wimpy Player for flash video and for mp3 audio. There's a free download of their software that will give you a chance to try before you buy. If you like it, and it's very easy to configure, the cost of registering the free trial software is reasonable, somewhere in the neighborhood of $60.00 or so for their complete package (in 2007, that is). HERE's a sample of how the single Wimpy player works.HERE's a sample of how the full Wimpy player works. HERE's a sample of how the .flv (flash) video player works. Many thanks to my son, Alan, for choosing me as his webmaster and for allowing me to use some of his videos and mp3's in the Cyber Classroom! Check out his website at: Alan Morphew Dot Com
PLAYING MIDI (Musical Instrument Digital Interface) FILES - MIDI can be nice if you just want a tune playing in the background while people are looking at your website. These are simple digital music files made with (usually) an electronic keyboard. Some sound great and can be a nice addition to your website if you don't want to go to all of the work and expense of building flash audio files as outlined above. There are thousands of free MIDI files available for download on the internet. I used MIDI Data Base to put up a sample MIDI page for the Cyber Classroom, but an internet search for keywords [ free midi files ] will get you more of them than you could ever check out. The code for inserting an embedded (plays as soon as your page is open) MIDI file is: <EMBED src="file.mid" autostart=true loop=false volume=100
hidden=true><NOEMBED><BGSOUND src="file.mid"></NOEMBED> - HERE's a little sample page with Johnny B. Goode playing in the background. Thanks, Chuck.
Also, HERE'S the code for the javascript I used to have Mighty Mouse play when this page loads.
SEARCH ENGINE REGISTRATION AND META TAGS - If you have opted to go for a paid server, you should now register your website with the main search engines. This is a fairly complicated and time-consuming process, but it can be done by anyone. Your greatest effort with search engine registration should be focused on getting your website recognized at Google. First you will have to build "META Tags" to go in the head area of your website. I always put the META Tags right after </title>. META Tags help some search engines find and index your website, and they rely on "keywords". Keywords are words that a web-surfer would be most likely to type in to a search engine in an effort to find your website. Give careful consideration to the keywords you finally decide to use, and don't use more than 15 or 20. Also, don't register with any one search engine more often than every two to four weeks, as the search engine may mark your site as "spam" and kick you out altogether. Here's a site that will assist you in building your META Tags. Once you have your META Tags constructed, paste them in to your website (somewhere before </head>) and re-load your page to your server. Now go to Submit Express or other similar web submitting page and begin the submission process. These site submission pages usually work fairly well, but I will tell you this...if you are truly hoping to dominate search engine results and you plan to be first or close to first position in the results, do not use a site submission webpage to register. Go directly, as I do for my customers, to the search engine home page to register. Remember, Google is an extremely popular search engine. If you're getting recognition from Google, you are covering over 90% of the web surfers. I'd also add that many other search engines are driven by the Google data base so others, like "DogPile" and "Mama", will also recognize your website.
DON'T STOP NOW! IMPROVE YOUR WEBSITE - Now you should be pretty savvy on basic HTML construction. You'll probably want to add a guestbook and counter, possibly a live video feed from an online web cam, etc. to your webpage. Again, go to http://google.com/ and search out any of these features. There are thousands to choose from and often they even give you the HTML code needed to place these features on your webpage. Another good place to find some of these webmaster goodies is: http://www.thefreesite.com/. I'll help this much, though. Following are some online items I've used, either for this webpage or for a customer's site. Check them out.
EMBEDDING YOUTUBE VIDEO - Go to You Tube dot Com and search out a video that you would like to have available on your page. Play the video at the YouTube site and make sure it is of good enough quality to place on your webpage. If it is, look for the "EMBED" code. Paste this embedding code into your webpage and your website visitors should be able to play the video from your website. Some embed codes are not shown so this means you cannot use it. My understanding is, and I cannot promise that this is the whole story, but my understanding is that if the "Embed Code" is offered you are not infringing on any copyright protections. Click on the picture that follows to play one of my sons music videos (Click For Alan Morphew's Website.![]()
FLASH INTRO FOR YOUR WEBPAGES - There is a free site on the internet located at: http://www.sophistronix.com/ which has an online generator that will allow you to build your own small/short animated page introduction. I use this on my own professional website as a rotating banner at the top of the page which is both eyecatching and informative. Flash is really just a movie, but flash openings, if very complicated, take awhile to load, particularly on a dial-up connection. Most of my customers are aware of that so they usually opt to have static banners rather than flash. If you like flash though, it is pretty simple to do by utilizing the link above (and it is fun to do.) We're trying to have fun, right? Click on this link to go to a sample that I've built for you to look at replete with a midi file playing in the background. Wyoming Web Design also offers some nice FREE flash introductions and I use them on a few genealogy websites that I master. Go HERE to see one of them in action. Are we having fun yet? ;-)
BUTTON AND BANNER ONLINE GENERATOR - I normally build all of my clients' website buttons using Adobe Photoshop. Here's a link that I'll give you, though, that is for a free online button and banner generator. I did build all the buttons and banners on this page using this generator, located at TomaWeb. Also, the Button Generator has some beautiful buttons with menus and submenus. Some are free but others will require a yearly payment. I opt for the yearly payment as I have some customers who prefer these buttons. I use them on my own website as well. Nice, and only $20 per year. The following buttons are from the Button Generator and are normally used on my professional page. Notice that some submenus are an option with this generator.


|
ANIMATED BANNER ONLINE GENERATOR - Here's another link to the free online generator where I created the blackboard with the little guy writing out the name of this page (the first graphic on this page). The generator is located at Ad Designer and you'll have to complete the registration to use their website.
MARQUEE TEXT SCROLLER - Here's a very nice text scroller that will show up as a box on your webpage. See it in action and grab the code HERE
FREE GUESTBOOKS - The following links are to a few free guestbooks that have proven to be quite dependable: SmartGuestbook sample at: (free but could be upgraded to be ad free), E Free Guestbooks sample at: (this one has been upgraded to paying for it to be ad free), and Boards 2 Go sample at: (free but could be upgraded to be ad free).
FREE HIT COUNTERS - Here are a couple of links to free hit counters that have proven to be quite reliable. Try Stat Counter or go to The FreeSite dot com. and choose from a couple of pages of them. Choose the one that looks best on your webpage.
ONLINE TABLE GENERATOR - If you would like to nest some of your website info in a table, try Bagism.Com.
UTILIZING FRAMES IN YOUR WEBPAGES - Frames divide your page into multiple pages. They can be very useful if you are trying to present a lot of material with each click of the mouse, or if you wish to have one or two parts of your page remain constant with only one of the parts of the page changing as in THIS EXAMPLE. In this example, the customer wanted his links and mp3 player to work without interruption, no matter which link was activated. Frames really worked out well for this particular website. I have put together a copy/paste frames assignment page for you to begin to learn how to program frames. Access it HERE and just follow the directions. It's a very user-friendly assignment, and upon completion you will have built your very own frames page!
SHORTCUT ICON (favicon) IN THE ADDRESS BAR - If your browser is Internet Explorer, you probably can't see this but if you're using most any other browser you can. Look in the address bar on this page and notice the little black and white "M" that precedes the webpage's address. It's a small detail but it's pretty fun to create and implement. Plus, it will show up in your Favorites Folder or Bookmarks Folder as well. A few rules: The icon must be 16 x 16 pixels in size, must be of a file size less than 50k (much less preferred), and must be saved as an ICO (Windows Icon) file - also sometimes called a Favicon (*.ICO) file. Never heard of a .ico file? Mac users can download Graphic Converter .(This is a shareware graphics program for the Macintosh platform OS9 [Classic 5.8.1] and OSX [X 6.0]) and it will save in the .iso format. For Photoshop users there is a free plug-in you can download at Telegraphics Dot Com which will give your Photoshop software the capability of saving a .iso file. If you are using a P.C. platform computer there is a free download of an image converter at Download Dot Com. I also found some cute .iso icons which may be downloaded from RW Designer Dot Com and they have an icon generator at that site as well. Save your icon with the name favicon.iso and upload it to the top level (root folder) in your FTP directory. Now revise the .htm or .html files in your top level directory by adding the following code between <head> and <title> to the pages that you would like to have display your little icon: <LINK REL="SHORTCUT ICON" HREF="http://www.PutYourAddyHere.com/favicon.ico"> - that's it!
Don't panic if the image doesn't appear right away as images typically do not show up in the address bar until after you empty your browser's cache and re-start your computer.
SO, HAVE SOME FUN with your programming and coding. Seek out some new things to try with your website. For example, most professionally designed websites use Cascading Style Sheets. Do a Google search and find out what they are and how to use them. When you finish mastering Cascading Style Sheets you might want to delve into some other new programming language or style. I master one website that is almost entirely built as an Image Map. Not too difficult to do, but measuring the "X" and "Y" coordinates on each piece of the photo can be a challenge and you need good graphics manipulation software to do it. You can see the Image Map site at: Sarah Morphew Photography. The bottomline is, HTML can be a most enjoyable and challenging hobby as well as a lucrative profession.
Got some time to kill? Go to our main website and follow some links: Click Here To Access MorpheWeb.Com
![]()
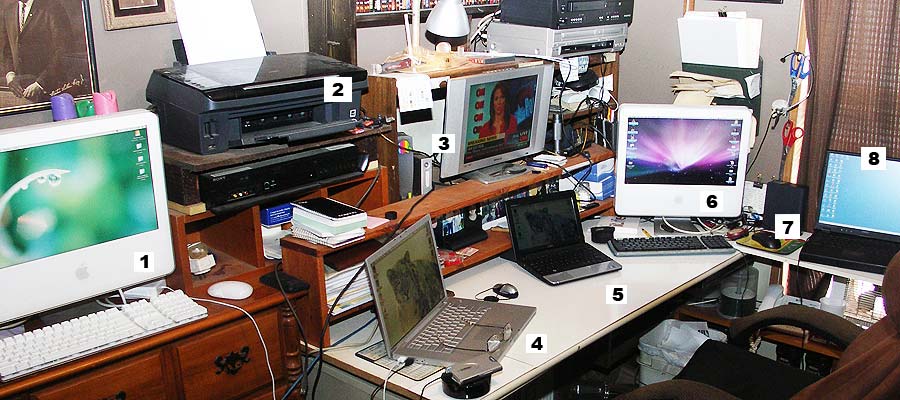
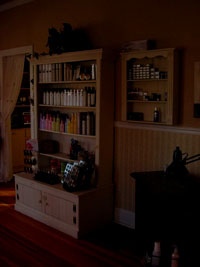
Was testing a new camera and shot this photo of my work area. L-R: 1. Imac G5, 2. All-In-One Scanner/Printer/Copier, 3. T.V. (even I take time to watch the weather)! ;-) 4. MacBook Pro, 5. Dell Mini running Macintosh software (hackintosh), 6. Imac G5, 7. Terrabyte Ex. H.D., 8. Dell Laptop running Windows software.
PROFESSIONALLY: My main professional excitement at this precise moment of '10 is the addition of flash mp3 sound and flash .flv video to customers' websites. Very fun stuff! PERSONALLY: My life is always filled with the love of my life of 48 years, Susan, and never can I seem to be able to wait to see my children and grandchildren. HERE'S our homepage. Incidently, this page is no longer being maintained. I am retired and loving it! (Last two sentences added 6-8-14)

I also am the owner/programmer/photographer for my part-time business, Morphew Web Design and Photography. I design and program both commercial and personal websites. If you'd like to contact me relative to my providing you or your firm with web services, click here for our initial contact. Please note that the purpose of this page is to provide future webmasters with online help in programming very INTRODUCTORY HTML. I can provide URL's where you will find more refined examples of my professional work. E-mail me and we'll discuss how reasonable it really is to have a world wide web presence. You will find me to be very professional, creative, and reasonable. Give me a shout!
out...
Larry Morphew
P.S.: One of my fav ani gifs...